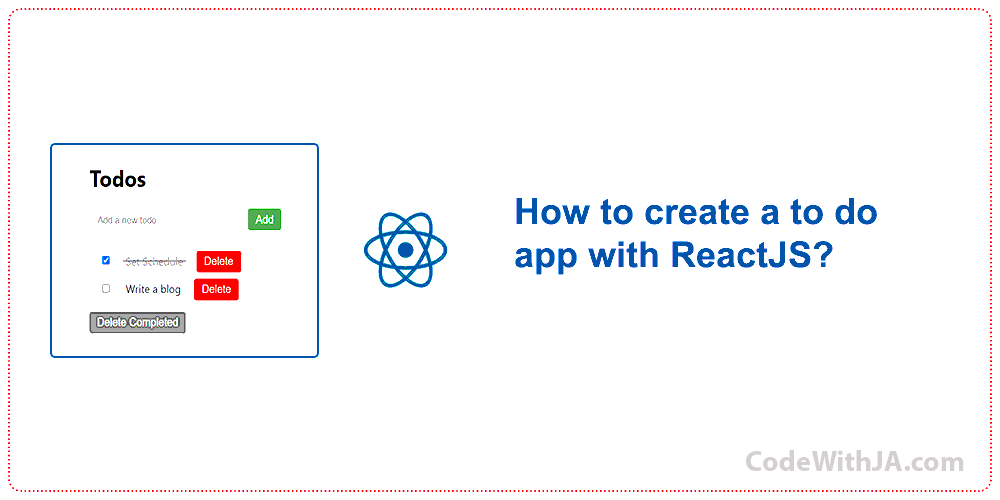
In this article I will show you how to create a todo app with ReactJS, in which you can add, edit, and delete any todo you want, also you can mark them as done and delete done tasks at once. This mini project will use your local storage to store the todos, you can change to a database or the storage area as you want. Let’s dive into the steps for building this mini-project
Step 1: Create React Project
Surely, you have installed Node.js and npm. If not, you can download and install them from the official website: https://nodejs.org/
Create a new React app using bellow command:
npx create-react-app todo-appAfter successful installation of react app, navigate to the project directory using the “cd” command and make sure that your project is installed correctly, to do that use the below command to start your project.
npm startStep 2: Creating components folder and its files
Navigate to src folder and make a folder by the name of components in the components folder create a file by the name of TodoForm.js and paste the following codes into it.
TodoForm.js
import React, { useState } from 'react'

const TodoForm = ({ addTodo }) => {
  const [text, setText] = useState('')

  const handleInputChange = (e) => {
    setText(e.target.value)
  }

  const handleSubmit = (e) => {
    e.preventDefault()
    if (text.trim() !== '') {
      addTodo(text)
      setText('')
    }
  }

  return (
    <form onSubmit={handleSubmit}>
      <input
        type='text'
        value={text}
        onChange={handleInputChange}
        placeholder='Add a new todo...'
      />
      <button className='submit-btn' type='submit'>
        Add
      </button>
    </form>
  )
}

export default TodoForm
Then create a JS file by the name of TodoItem.js and past the bellow codes in it.
TodoItem.js
import React from 'react'

const TodoItem = ({ todo, toggleComplete, deleteTodo }) => {
  return (
    <div
      style={{
        textDecoration: todo.completed ? 'line-through' : 'none',
        color: todo.completed ? 'gray' : 'black',
      }}
    >
      <input
        className='checkbox'
        type='checkbox'
        checked={todo.completed}
        onChange={() => toggleComplete(todo.id)}
      />
      <span className='task-list'> {todo.text} </span>
      <button className='delete-btn' onClick={() => deleteTodo(todo.id)}>
        Delete
      </button>
    </div>
  )
}

export default TodoItem
The last file in components you should make a file by the name of TodoList.js and contain the bellow codes in it.
TodoList.js
import React from 'react'
import TodoItem from './TodoItem'

const TodoList = ({ todos, toggleComplete, deleteTodo }) => {
  return (
    <div className='todo-list'>
      {todos.map((todo) => (
        <TodoItem
          key={todo.id}
          todo={todo}
          toggleComplete={toggleComplete}
          deleteTodo={deleteTodo}
        />
      ))}
    </div>
  )
}

export default TodoList
Step 3: Styling the project
In this step we will replace the CSS code which is contained in Index.css, generally this file is generated by the React itself, open and replace the bellow styles. Remember that this file is contained in src folder.
Index.css
body {
  margin: 0;
  font-family: -apple-system, BlinkMacSystemFont, 'Segoe UI', 'Roboto', 'Oxygen',
    'Ubuntu', 'Cantarell', 'Fira Sans', 'Droid Sans', 'Helvetica Neue',
    sans-serif;
}

code {
  font-family: source-code-pro, Menlo, Monaco, Consolas, 'Courier New',
    monospace;
}

.container {
  width: 80%;
  background-color: rgb(235 233 233);
  margin: 2rem auto;
  border-radius: 0.5rem;
  height: 77vh;
  padding: 2%;
  overflow-y: auto;
}

input[type='text'] {
  width: 15rem;
  padding: 9px 12px;
  margin: 0px 0;
  box-sizing: border-box;
  border-radius: 5px;
  border: 0.05rem solid #b9b4b4;
}

button {
  border: none;
  color: white;
  padding: 6px 12px;
  text-align: center;
  text-decoration: none;
  display: inline-block;
  font-size: 16px;
  cursor: pointer;
  border-radius: 4px;
}

.submit-btn {
  background-color: #4caf50;
  margin: 0 0 0 10px;
}

.delete-btn {
  background-color: red;
}

.completed-btn {
  background-color: gray;
}

.todo-list {
  padding: 1rem;
}

.task-list {
  padding: 1%;
  margin: 0.3rem;
}

.checkbox {
  margin-top: 1rem;
}

.line-through {
  text-decoration: line-through;
  color: grey;
}
Step 4: Modify the App.js file
In this step we will change the App.js file, this file is also contained in src directory, open the file and past the bellow codes in it.
App.js
import React, { useState, useEffect } from 'react'
import TodoForm from './components/TodoForm'
import TodoList from './components/TodoList'

const App = () => {
  const [todos, setTodos] = useState(
    () => JSON.parse(localStorage.getItem('todos')) || []
  )

  useEffect(() => {
    localStorage.setItem('todos', JSON.stringify(todos))
  }, [todos])

  const addTodo = (text) => {
    const newTodo = {
      id: Math.random(),
      text,
      completed: false,
    }
    setTodos([...todos, newTodo])
  }

  const toggleComplete = (id) => {
    const updatedTodos = todos.map((todo) =>
      todo.id === id ? { ...todo, completed: !todo.completed } : todo
    )
    setTodos(updatedTodos)
  }

  const deleteTodo = (id) => {
    const updatedTodos = todos.filter((todo) => todo.id !== id)
    setTodos(updatedTodos)
  }

  const deleteCompletedTodos = () => {
    const updatedTodos = todos.filter((todo) => !todo.completed)
    setTodos(updatedTodos)
  }

  return (
    <div className='container'>
      <h1>Todos</h1>
      <TodoForm addTodo={addTodo} />
      <TodoList
        todos={todos}
        toggleComplete={toggleComplete}
        deleteTodo={deleteTodo}
      />
      <button className='completed-btn' onClick={deleteCompletedTodos}>
        Delete Completed{' '}
      </button>
    </div>
  )
}

export default App
Step 5: Modify the index.js file
By default, the index.js file contains some js codes, we will make some changes and you can paste the below codes.
Index.js
import React from 'react'
import ReactDOM from 'react-dom/client'
import './index.css'
import App from './App'

const root = ReactDOM.createRoot(document.getElementById('root'))
root.render(
  <React.StrictMode>
    <App />
  </React.StrictMode>
)
Successfully, you have create your todo app in ReactJS!
Check your browsers and see the result for todo app mini-project
